How to Build a Basic Outdoor Shelter: Step-by-Step Guide Using Natural Materials
Learn how to build a simple, reliable outdoor shelter using natural materials. This step-by-step guide covers planning, construction, and survival tips for creating protection from wind, rain, and cold using what nature provides.
OUTDOOR SKILLS AND HOW TO
P & P
10/17/20254 min read


How to Build a Basic Outdoor Shelter: Step-by-Step Guide to Constructing Simple Shelters Using Natural Materials
When you’re outdoors for an extended time — whether camping, hiking, or surviving unexpectedly — one of your top priorities is shelter. A well-built shelter protects you from rain, wind, and cold, helping you retain body heat and stay safe through the night.
You don’t need fancy gear or advanced tools. With a bit of patience, some resourcefulness, and an understanding of your surroundings, you can build a reliable, natural shelter using the materials around you.
This guide walks you through the step-by-step process of constructing a simple outdoor shelter, along with practical tips for staying warm, dry, and secure in nature.
Step 1: Choose the Right Location
The success of your shelter begins with site selection. Choose wisely — the ground you build on can mean the difference between a comfortable night and a miserable one.
What to look for:
High ground: Avoid valleys or dips where water can collect.
Natural windbreaks: Build near trees, rock outcroppings, or dense brush to block wind.
Dry ground: Avoid soft, spongy, or muddy areas.
Proximity to materials: Choose a site where sticks, leaves, branches, and logs are abundant.
Bonus Tip: Face the entrance of your shelter away from the prevailing wind, and slightly downhill to help water drain away from your structure.
Step 2: Know the Shelter Types
Before gathering materials, decide what kind of shelter you need. Different situations call for different designs, depending on weather and available resources.
Common Natural Shelters:
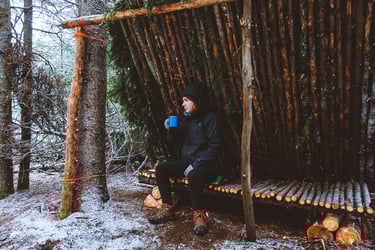
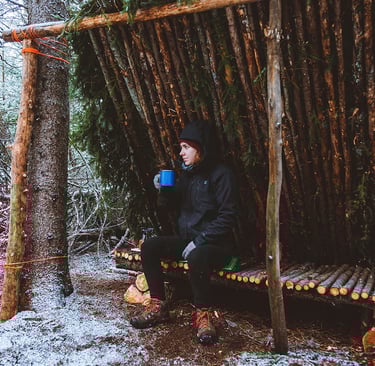
Lean-To Shelter: Simple and fast. Built against a ridge pole supported by two upright branches, with sticks leaned against it to form a wall.
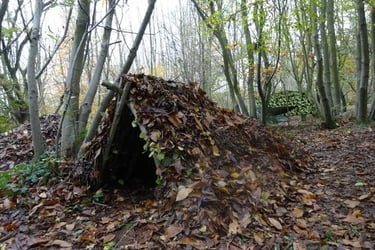
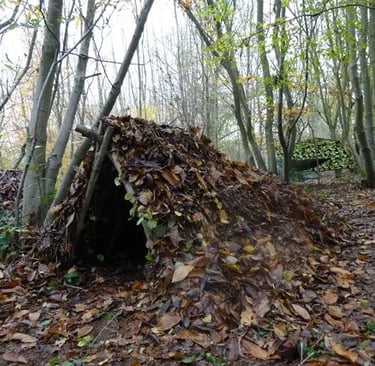
Debris Hut: Great for insulation and protection from cold. Built by forming a ridge pole frame and covering it with thick layers of leaves, branches, and grass.
A-Frame Shelter: Two sides sloped against each other for full coverage — sturdy and wind-resistant.
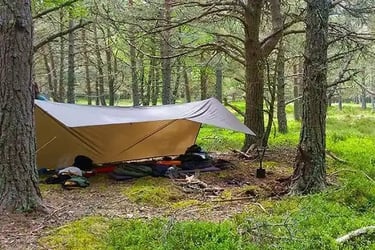
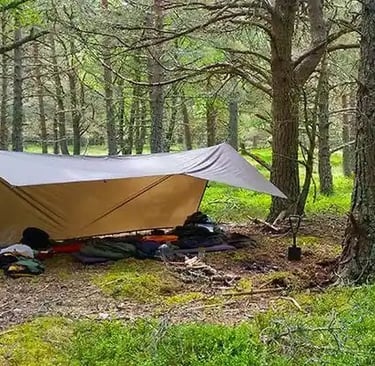
Tarp or Hybrid Shelter: Combine natural materials with a tarp, poncho, or emergency blanket for waterproofing.
For most short-term outdoor stays, a lean-to or debris hut works best — simple to construct, stable, and quick to insulate.
Step 3: Gather Your Materials
Nature provides everything you need if you look closely.
Basic materials:
Long, sturdy branches (for frame and ridge pole)
Smaller sticks and twigs (for structure walls)
Leaves, pine needles, and grass (for insulation and roofing)
Rocks (for securing edges or creating windbreaks)
If you have cordage, paracord, or even shoe laces, they’ll help with tying supports — but you can also use natural vines or flexible roots.
Step 4: Build the Frame
Your frame gives your shelter structure and strength.
For a Lean-To Shelter:
Find a sturdy horizontal branch or ridge pole about 6–8 feet long.
Rest each end on forked branches or against a log or rock.
Lean smaller branches at a 45° angle along one side of the ridge pole to form your wall.
For an A-Frame Shelter:
Secure a ridge pole between two forked branches.
Lean smaller sticks on both sides to form a triangle-shaped roof.
Leave a small opening at one end for an entrance.
Make sure the structure feels solid — test it by pressing gently. It should support its own weight before you add insulation.
Step 5: Add Insulation and Covering
Insulation is what turns a basic frame into an effective shelter. The thicker and denser your covering, the better it will trap heat and repel water.
Use what’s available:
Leaves, pine needles, moss, grass, bark, ferns, or even reeds.
Start from the bottom and layer upward, overlapping like shingles to help shed rain.
Add at least a foot of insulation thickness for cold or wet weather.
For flooring, build a bed of leaves, pine needles, or boughs to insulate yourself from the cold ground. Staying dry and off the earth makes a huge difference in warmth and comfort.
Step 6: Weatherproof Your Shelter
Even the best shelter can fail if it doesn’t manage water and wind properly.
Pack leaves and moss into gaps to block drafts.
Use mud or wet clay to seal holes in the roof or walls if rain is expected.
Weigh down loose materials with rocks or logs to prevent them from blowing away.
If you have a tarp or poncho, use it as a waterproof top layer over your debris.
If conditions are cold, consider adding a reflector wall — a small wall of logs or stones in front of your shelter to reflect fire heat inside.
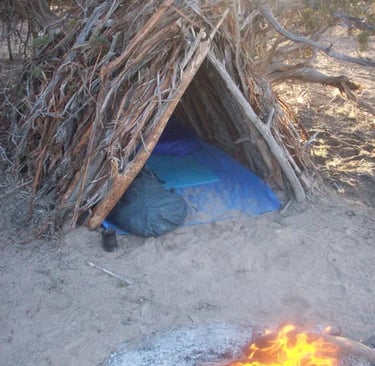
Step 7: Fire and Ventilation
Fire adds warmth, comfort, and protection, but it must be used safely.
If your shelter is open-front (like a lean-to), build your fire a few feet in front of the opening. For better heat reflection, place a wall of logs or rocks behind the fire, directing warmth back toward the shelter.
Never build a fire inside unless the shelter is made of nonflammable materials and has clear ventilation.
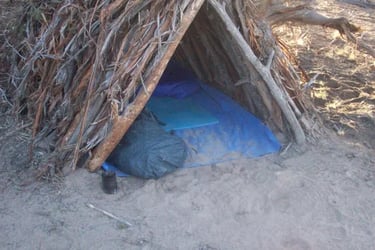
Step 8: Final Touches and Comfort
Once your shelter is stable and insulated, add finishing touches for comfort and safety:
Smooth the ground and clear sharp debris.
Create a raised sleeping platform using thick branches or boughs.
Keep your gear dry by hanging it from branches or storing it under your bed layer.
Check for insects, snakes, or small animals before settling in.
Take a few minutes to adjust walls or insulation for airflow and warmth balance.
Step 9: Maintain and Monitor
Shelters made from natural materials require small upkeep — especially if you plan to stay more than one night.
Repack or replace insulation daily as it compresses.
Repair weak spots after rain or strong winds.
Keep firewood dry by stacking it under your shelter’s edge.
A well-maintained shelter can last several days or even weeks with small adjustments.
Final Thoughts: Simplicity is Survival
Building a shelter isn’t about perfection — it’s about practicality. Your goal is to create a safe, dry, and insulated space with the resources available.
Every environment offers something different: dense leaves in forests, reeds near rivers, or branches in the highlands. What matters most is your understanding of structure, airflow, and insulation.
In the wild, comfort is earned through simplicity. The more you practice building with nature, the faster and more efficient you become.
Your first shelter might be rough — but by your third, you’ll start to feel what true resourcefulness really means.